$60.29
$88.63
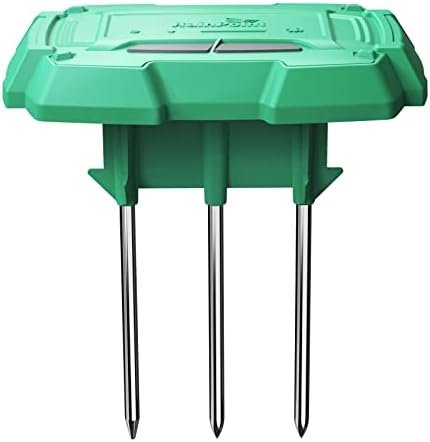
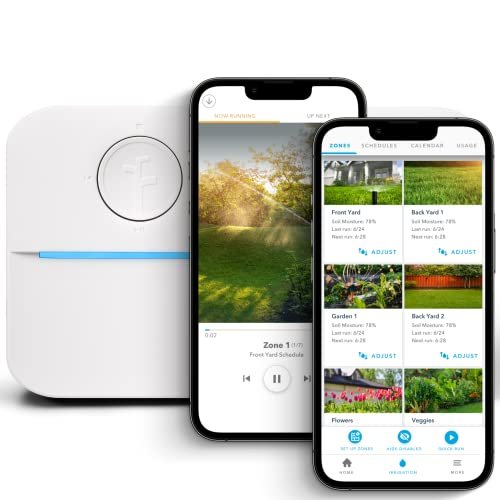
5.0 out of 5 stars Very Helpful Addition to the RainPoint Irrigation System I have plants that I want to maintain in a remote location and would like to know soil conditions & temperature to help me adjust the irrigation schedule without having to call the neighbor and find out if it rained, so I ordered this moisture and temperature sensor to go along with the Wifi Water Timer System ( https://smile.amazon.com/dp/B0BP7G1FTP ). Note, this sensor must work with the system and is not a stand-alone Wifi sensor. The RainPoint Moisture & Temperature Sensor communicates via RF frequencies to the Hub, which in turn communicates with the Wifi system which allows me to control the irrigation through the RainPoint app and Wifi actuated Water Timer. (see photo of system) Setup of the System is easy (I followed the detailed instructions in the printed manual, but there’s also a link to a setup video); you’ll need a WiFi Router that operates on the 2.4 GHz frequency, and 4 AA batteries for the Water Timer (the yellow & gray device with the hose connections). The app for my android phone was available on the Google Play store (iPhone app is available on the App Store), so I downloaded it, opened it on my phone, and followed the instructions to connect the app to the router. Next I followed the instructions to connect the Hub (the oval device with the outlet), then installed the batteries into the Water Timer, and followed the instructions for pairing the Water Timer to the Hub. (Note that the Water Timer communicates with the Hub, and the Hub communicates with your Router, so the Water Timer doesn’t directly pair with the router.) When the Hub was active and the RainPoint App was installed on my phone, I set up the Sensor. As per the instruction manual, I unscrewed the four small screws in the small panel in the middle of the bottom of the sensor (Note this will require a small jewelry screwdriver or a #1 sized Phillips head screwdriver) and installed three AAA batteries but left the battery compartment open. I then opened the RainPoint app on my phone, tapped the “sensor” icon at the bottom of the main page to take me to the sensor page (see photo). I then pressed the small black, recessed button on the Sensor that is located between the batteries and the three soil sensor prongs. (Note this is hard to press if you have fat fingers like mine, so you can either use your fingernail, or the tip of the screwdriver, or other small object). Once this button is pressed, a red light glows on the top side of the sensor indicating it is in pairing mode. Then go to the RainPoint app that’s already on the “sensor” page and look for the grayed-out soil sensor switch and touch it to turn it on. (See included screenshot photo) Just to the left of the switch icon, you will see a small loading symbol indicating that the Hub is pairing with the sensor. Mine took about 15-20 seconds to pair, and then the soil sensor was active. After I securely replaced the battery cover, I was ready to use the sensor. The RainPoint software that runs on my phone is intuitive and easy to operate; From the Main “Parameter” menu, it lets me know how many gallons (or liters) of water have been used, the battery status, whether the water is running or not, and the next scheduled irrigation. From the “Irrigation control” menu, I can choose between 1 and 60 minutes of irrigation, and from the “Plan” menu, I can set my watering schedule and implement rain delays if desired. The soil sensor can be set up to activate the water timer based on the soil moisture levels, but note that this setting must be performed on the sensor device, not in the software. In playing with the system, I discovered that some of the features are really helpful for remote monitoring, for instance, the Water Timer not only turns the water on and off, but it measures the water usage, allowing you to know whether the water is actually flowing. With the moisture sensor in place, the soil temperature and humidity will also be indicated on the main page, and graphed on a chart on the sensor page – very handy! I also like that the app sends me push alerts on my phone letting me know when the system is active and when it stops. Additionally, the Hub has an integral 110 volt outlet that can be controlled by the RainPoint app so that devices such as grow lights can be activated -the software even has a built-in timer function for this outlet. Suffice to say, this is a powerful system with lots of options I’ve not even mentioned. I was pleased to get more control over my irrigation system and be able to operate it remotely for about $100 including the sensor. I consider myself to be fairly technically proficient, however, with all emerging technologies there are little hiccups, both with the product and with user error, so I also had a chance to communicate with RainPoint’s Customer Service. They were responsive and helpful, in answering my questions both by telephone and by email. 4 people found this helpful
Taproot Supplies